I thought I'd go over the process of making some of the applique pieces for this quilt. I did some testing (see Part 3) and they came out really well and went fairly quickly.
Let me tell you though, this process makes a ton of trash! After cutting on the 12x12" mat, you peel off the excess which is trash. Do that to interfacing and the fabric and you can see how this generates a lot of trash but the pattern pieces are getting cut and cut quickly.
After scanning the images and importing them into the Silhouette software, I can place them on the 12x12" mat and have the Cameo cut out interfacing or freezer paper backed fabric. You just have to remember that if you're cutting out the fabric to enlarge your pattern piece first so you have plenty of fabric to turn under once the interfacing is ironed on.


Once the interfacing was cut out, I did some test pieces by just ironing the interfacing to some fabric and cutting around the shape leaving a generous 1/4".

Hearts are a little tricky but once you know to do it it's pretty easy. First of all, you have a sharp dip at the top of the heart and the two lobes and of course the point at the bottom. In the picture below, you can see the "V" shapes I've outlined along the lobes of the heart. This is because there is more fabric along that curve that you need to remove. It'll make it easier to get a nice rounded edge on the curve.


The bottom picture shows were I've removed the "V"'s or darts in the fabric. I did not cut all the way to the interfacing - that's important. I've also just cut the fabric down into the V at the top of the heart. I used Elmer's Disappearing Purple Glue Stick along the fabric flanges at the top and gently fold the fabric over the interfacing, creating a nice V at the top of the heart.


Continue glueing and folding the fabric over as you go along the heart. Don't spread too much glue on at once since it dries quickly.
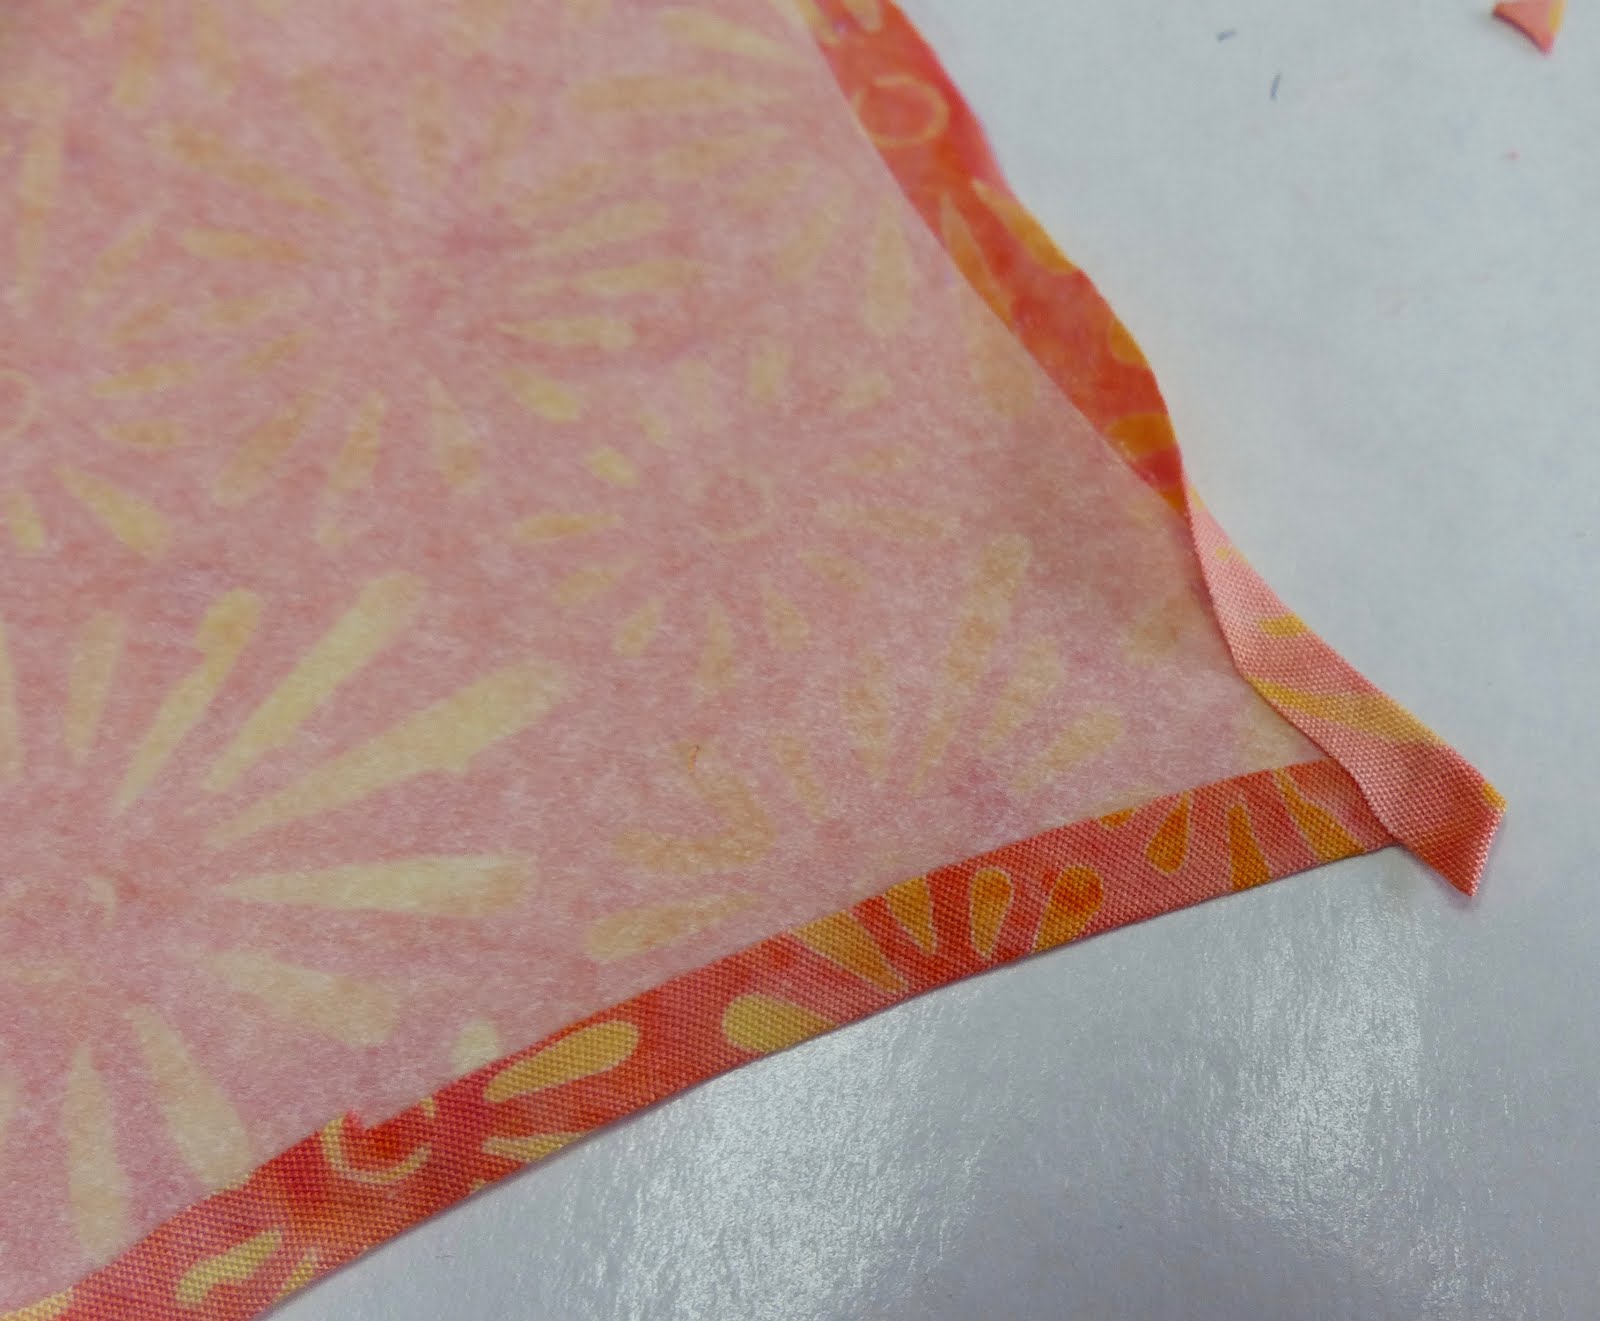
Continue along the side of the heart down to the point. Then work your way back up the other side. The second side will overlap at the point. This is fine. If you want you can turn the excess fabric up at the point. You can clip this little flag off later if you want.


After your done, turn the shape over and inspect it especially on the rounded areas. It's very likely you will get little points in the fabric. Just turn it over and spread the point out before all the glue dries. Once you do a dozen or so, you'll get better at it and it will go more quickly.

After the glue has dried (I usually leave mine at least 24 hours) go ahead and remove the interfacing paper. Go slow and easy. You don't want to 1). Tear your fabric and 2). Rip the paper out so badly that you damage the shape. The glue from the interfacing will remain and then you can iron the shape onto your fabric where you want it. This will hold it in place while you sew it down.
That's a quick overview on how I'm making the applique shapes. I've got a lot done already. Several sizes of heart shapes, birds, petals and circles. I really wouldn't recommend this type of applique quilt without an electric cutter machine. I cut 60 shapes out on interfacing and fabric within 1 hour. That's doing all the computer work, cutting my interfacing to the mat, releasing the shapes etc. Everything. And I'm not working on this project 8 hours a day either and I still feel like I'm making progress.
There's other ways to create appliques, but I thought I'd show how I'm doing it for this project.
Let me tell you though, this process makes a ton of trash! After cutting on the 12x12" mat, you peel off the excess which is trash. Do that to interfacing and the fabric and you can see how this generates a lot of trash but the pattern pieces are getting cut and cut quickly.
After scanning the images and importing them into the Silhouette software, I can place them on the 12x12" mat and have the Cameo cut out interfacing or freezer paper backed fabric. You just have to remember that if you're cutting out the fabric to enlarge your pattern piece first so you have plenty of fabric to turn under once the interfacing is ironed on.


Once the interfacing was cut out, I did some test pieces by just ironing the interfacing to some fabric and cutting around the shape leaving a generous 1/4".

Hearts are a little tricky but once you know to do it it's pretty easy. First of all, you have a sharp dip at the top of the heart and the two lobes and of course the point at the bottom. In the picture below, you can see the "V" shapes I've outlined along the lobes of the heart. This is because there is more fabric along that curve that you need to remove. It'll make it easier to get a nice rounded edge on the curve.


The bottom picture shows were I've removed the "V"'s or darts in the fabric. I did not cut all the way to the interfacing - that's important. I've also just cut the fabric down into the V at the top of the heart. I used Elmer's Disappearing Purple Glue Stick along the fabric flanges at the top and gently fold the fabric over the interfacing, creating a nice V at the top of the heart.


Continue glueing and folding the fabric over as you go along the heart. Don't spread too much glue on at once since it dries quickly.
Continue along the side of the heart down to the point. Then work your way back up the other side. The second side will overlap at the point. This is fine. If you want you can turn the excess fabric up at the point. You can clip this little flag off later if you want.

After your done, turn the shape over and inspect it especially on the rounded areas. It's very likely you will get little points in the fabric. Just turn it over and spread the point out before all the glue dries. Once you do a dozen or so, you'll get better at it and it will go more quickly.

After the glue has dried (I usually leave mine at least 24 hours) go ahead and remove the interfacing paper. Go slow and easy. You don't want to 1). Tear your fabric and 2). Rip the paper out so badly that you damage the shape. The glue from the interfacing will remain and then you can iron the shape onto your fabric where you want it. This will hold it in place while you sew it down.
That's a quick overview on how I'm making the applique shapes. I've got a lot done already. Several sizes of heart shapes, birds, petals and circles. I really wouldn't recommend this type of applique quilt without an electric cutter machine. I cut 60 shapes out on interfacing and fabric within 1 hour. That's doing all the computer work, cutting my interfacing to the mat, releasing the shapes etc. Everything. And I'm not working on this project 8 hours a day either and I still feel like I'm making progress.
There's other ways to create appliques, but I thought I'd show how I'm doing it for this project.
Comments
Post a Comment