
On Wander Lane - Block of the Month (April)

 Our second BOM for On Wander Lane is for the month of April titled Bunny Knoll. 


We had a slight hiccup with our applique pieces but it was pointed out and the provider got corrections sent to us. Which means, I couldn't do the main block first and so I worked on the three border blocks first. 

Tulip Block

This block went together fairly easily. The background fabric squares were sewn on the diagonal on the tulip fabric and trimmed, while the green leaf fabric was placed on the background fabric. Sew the pieces together and you get a tulip flower. 


Block on Block

This block was made using a 3.5" square piece with a picture of a house and flower on it. Some background pieces was added using two different fabrics and sewed together. 


Flower Basket Block

This block was made using half square triangle (HST). I've never done HST's this way before but I've seen it done. The instructions were clear and I didn't have any trouble. It's difficult to see but I've drawn straight lines on the back from corner to corner (both directions), then I sewed on either side of the drawn line by 1/4". Then I cut along the lines I drew and on the diagonal, giving me 8 half square triangles. 
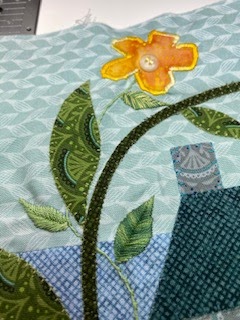


Then, I sewed them to the other pieces and viola a flower basket. 

Main Block

After I received my placement piece, I got started on the main block. I admit, I didn't like one of the colors, a white fabric, so I replaced it with a darker blue. Only a small corner will remain uncovered and I liked the look of a darker color in that corner. 


Next, I placed all the applique pieces and stitched them down using an applique stitch or a zigzag stitch. 


Finally, I decided to add a bit of hand embroidery like I did on the first block and I'm sure I'll continue to frustrate, wait, I meant "challenge" myself on future blocks.  I also added a second flower to complete my block. I might add something else later but for right now, it's finished.


Comments

Popular posts from this blog

Jacobean Journey Quilt - Trunk Show

On Saturday, January 17, I went to my local quilt shop, Quilt Beginnings, and everyone who made either a Jacobean Journey or Feathered Star quilt last year brought in their projects. Some were finished, close to being finished or still in pieces.  Below is my quilt.  Its brown, cream, peach and a melon like color.  The blocks have been really fun to do and putting all the blocks together have definitely challenged me and some of the other ladies I spoke with. The next two pictures, are of a mother and daughter and their quilts.  They have a similar theme with black, gray, red, white and dark gold color. When asked if they were going to attempt to do the next Hoopsister's embroidery quilt "Sewn Seeds," which there's a sneak peak of at the end, they both said, "Nooooooooooo." Also, these guys say they're novice sewers but I think they've graduated! This lovely lady, did her Jacobean Journey quilt in red, pink, white and a very light blue

Jacobean Journey Quilt - Block A3H8

We finally started the applique border blocks of the Jacobean Journey quilt this month and the instructions that I was given was a little... well, confusing.  According, to Hoopsisters the instructions for several blocks are the same so they don't want to print different blocks with the same type of instructions.  So their solution was to draft the instructions using a sample of the blocks with pictures for that one block. However, additional blocks do not get their own set of pictures but share the same instructions.  For example, if a block has only 2 fabrics (say 1 and 4) you follow instructions A, which will have pictorial examples of only 1 type of block, which may or may not match the block you are currently stitching out.  So this was fairly confusing for me since my Babylock doesn't show file names just pictures and my pictures didn't match the set of instructions (or so I thought) I received since the pictures didn't match at all. So my suggestion would be

Jacobean Journey Quilt - Outer Border

I've been working on the outer border for a while now and I'm about 75% done.  Out of 44 blocks I've got around 32 done so I'm getting there. I decided not to do a video of these blocks just photos. There's a lot of fabric placement and thread changes and trying to operate a camera at the same time is just begging for something bad to happen. So I decided not to risk it. Here's the border block and corners. They are the smallest blocks I've done for this quilt. The borders are 4.5'x6" and roughly 12K stitches and the corners are 4.5" square with around 9K stitches. Outer Border Corner The outer borders require some accurate piecing first.  The first piece for the corner is strips of fabrics 1 and 4. The second strip is made from fabrics 3, 1 and 4. In the top photo of the square, strip 1 is the white, brown, white and strip 2 is pink, white and brown. To make the square, stitch out your placement area. Then place strip 1, right si