If you're overrun with tomatoes at the end of the season and you don't want to start canning, making tomato jam is the next best thing. I admit it. I'm not a huge fan of raw tomatoes. I like them as salsa and especially in BLT sandwiches but I have to admit, I'm not a fan of the watery squishiness that plagues my sandwich causing my bread to get soggy or help the mayonnaise make a run for it but with tomato jam, you don't have that problem.
Making tomato jam is simply taking pounds of tomatoes and cooking all the water out of them and adding a bit of sugar and spices. That's it. Trust me on this. It is awesome and I'm not a huge tomato fan.
I would recommend doubling the recipe since this does't make very much and it's just so darn tasty you might want it on everything from toast, eggs, quiche and of course to accompany bacon. Store your tomato jam in the refrigerator and it should keep about a week or two but I don't know since I've never had jam around longer than a few days. It's also nice to give as gifts to neighbors or family. I would just recommend that you only give it to people you really like because again, it's just awesome stuff. Simple yet awesome. You do have to babysit the pot towards the end of cooking but only for last 20 minutes or so. If you don't, your jam will burn and that would be a tragedy.

Tomato Jam Recipe
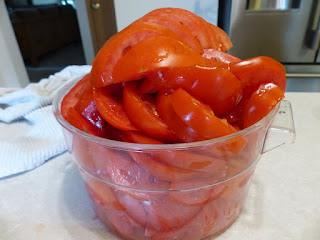
3lbs. of medium tomatoes (canned will work if tomatoes are not in season)
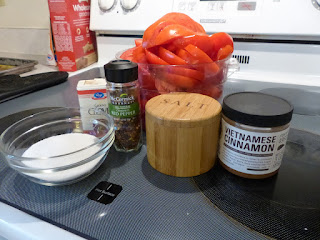
1tsp of salt
1/4C sugar + 1 tsp.
1/2 tsp of cinnamon
1/4 tsp hot pepper flakes (optional)
pinch of cloves
1/2 lemon, juice
Directions
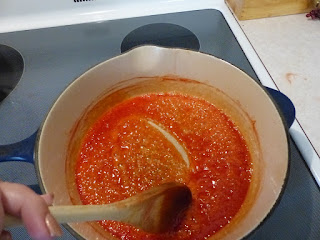
Core and chop the tomatoes and place in a large bowl. Sprinkle with 1 teaspoon of salt and 1 teaspoon of sugar. Let the tomatoes sit for a few hours so they release their juices. Strain the tomatoes and place the liquid into a large pot. Add the 1/4 C of sugar to the juice and bring to a boil. Keep boiling until the juices are reduced to a syrup consistency. This should take around 15 minutes depending on how much liquid your tomatoes gave up. Your spoon should leave a clean trail through the syrup when it's thick enough.
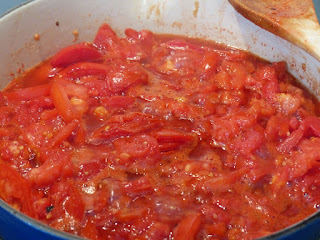
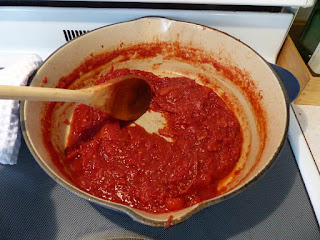
Add the spices and the tomatoes and stir. Bring to a boil and continue cooking roughly 45-60 minutes. The tomatoes will continue to breakdown and liquid will continue to evaporate. When they're done, the tomatoes will be gooey and reach a jam-like consistency. Taste for sugar, salt and heat and adjust to taste. Add a little lemon juice to brighten the flavor at the end.
Making tomato jam is simply taking pounds of tomatoes and cooking all the water out of them and adding a bit of sugar and spices. That's it. Trust me on this. It is awesome and I'm not a huge tomato fan.
I would recommend doubling the recipe since this does't make very much and it's just so darn tasty you might want it on everything from toast, eggs, quiche and of course to accompany bacon. Store your tomato jam in the refrigerator and it should keep about a week or two but I don't know since I've never had jam around longer than a few days. It's also nice to give as gifts to neighbors or family. I would just recommend that you only give it to people you really like because again, it's just awesome stuff. Simple yet awesome. You do have to babysit the pot towards the end of cooking but only for last 20 minutes or so. If you don't, your jam will burn and that would be a tragedy.


Tomato Jam Recipe
3lbs. of medium tomatoes (canned will work if tomatoes are not in season)
1tsp of salt
1/4C sugar + 1 tsp.
1/2 tsp of cinnamon
1/4 tsp hot pepper flakes (optional)
pinch of cloves
1/2 lemon, juice
Directions
Core and chop the tomatoes and place in a large bowl. Sprinkle with 1 teaspoon of salt and 1 teaspoon of sugar. Let the tomatoes sit for a few hours so they release their juices. Strain the tomatoes and place the liquid into a large pot. Add the 1/4 C of sugar to the juice and bring to a boil. Keep boiling until the juices are reduced to a syrup consistency. This should take around 15 minutes depending on how much liquid your tomatoes gave up. Your spoon should leave a clean trail through the syrup when it's thick enough.
Add the spices and the tomatoes and stir. Bring to a boil and continue cooking roughly 45-60 minutes. The tomatoes will continue to breakdown and liquid will continue to evaporate. When they're done, the tomatoes will be gooey and reach a jam-like consistency. Taste for sugar, salt and heat and adjust to taste. Add a little lemon juice to brighten the flavor at the end.
Comments
Post a Comment